I have a very boring hallway and I finally decided it was time to do something about it. I figured I had enough "junk" laying around that I could put something together that would make it a bit more appealing, so this is what I came up with...
I needed a table of some kind that would fit in the tiny space, but everything I had was either too wide length-wise or width-wise, so I went out into the shop to see what type of wood I could use to make a tabletop. I new I wanted something "heavy" looking so I used 2 x 4's. I cut three pieces 32" long, glued and screwed them together by attaching 1 x 2 underneath. I gave it good sanding with 100-girt and then 220-grit sandpaper. I applied a dark walnut stain, but it wasn't quite dark enough, so I sprayed some oil rubbed bronze (by Krylon) paint onto a damp cloth and rubbed it into the surface. (this was a bit of an experiment, but it worked!)
Once dry, I need to attach the tabletop to the wall. I found two metal shelf brackets out in the shop and even though they were ugly, I knew you weren't going to see them once I was finished.
After attaching everything to the wall, I took some measurements and made a burlap skirt. So far, so good. (except for the pictures I've taken!)
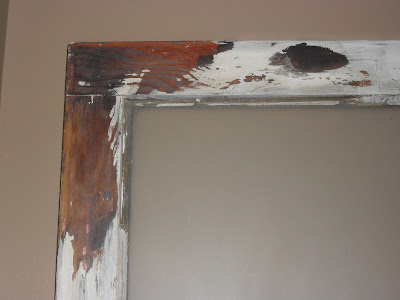
I wanted to hang a mirror, but I didn't have anything large enough for the wall space so I decided to refinish this window.
The "pink" just wasn't going to work with my color scheme so I gave the frame a quick sanding to loosen any chipping paint and then stained the bare wood areas with a dark walnut stain. I painted the "pink" areas with a dark brown paint and I wasn't going for "perfection".
Once it completely dried, I rubbed random areas with vaseline and then applied a topcoat in a creamy white. Again, let it dry completely. Next, I rubbed off the areas covered in vaseline to reveal the basecoat.
I then applied a tinted wax to give the window frame more of an "aged" feel. I make my own tinted wax with Johnson's Floor Paste Wax and Winsor & Newton Oil paint in burnt umber (this comes in a 37ml tube available at art or stationary stores). My recipe varies depending on how dark I want the wax so you might want to experiment with this on your own, however, I usually use about 1/2 cup wax to 1-2 tsp. oil paint. Mix it in a container and apply with a rag. Let dry and then buff off.
I added a few accessories and now the end of the hallway isn't so boring.
Now I need to get to work on the rest of the hallway! Thank you for stopping by...hope you'll come back for another visit!
Lesa


Love the floating table idea. Great space now. Fantastic little makeover.
ReplyDeleteWow! How awesome. Who would've thought that this was a floating tabletop. Brilliant idea. Looks just like a table sitting there with a skirt. Love the makeover on the window. Thanks for sharing your recipe for the wax.Enjoy your day!
ReplyDeleteLove it - the floating table is really clever Lesa!
ReplyDeletePeggy
What a great idea. I just love the idea of a floating table. Thanks for sharing at DIYbyDesign.
ReplyDeleteLooks great!
ReplyDeleteYou're such a clever girl! I'd never heard of the Vaseline idea... thanks for sharing :)
ReplyDeletehi Lesa ... very clever floating table for the limited space. Looks very nice. I like using the Vaseline method too. Gives a realistic time-worn look.
ReplyDeleteBlessings,
Audrey Z. @ Timeless Treasures
http://audreyzumwalt.blogspot.com/
I love this idea! So creative and I adore burlap! i'm your newest linky follower and I would love if you would link up to my little party: www.nutmegplace.com/2012/02/show-off-saturday-1.html
ReplyDeleteHope to see you there!
Stopping by from Nifty Thrifty! Your vignette is beyond pretty. I really like everything about it, the burlap of course, the window of course, and all of it. The floating table was a very creative idea that really works well in your space. I've got my fingers crossed that you'll share on Sunday's Best Party this evening!
ReplyDelete