Thursday, June 30, 2011

Patio Decor...Pretty Up a Fence

A few posts ago, I refinished a cabinet.  I replaced the glass in the doors with chicken wire...well, here is what I did with the leftover glass...


I started with the two pieces of glass and then using 1X4 pine,  I built two frames.  It was a very simple construction with no mitred corners.  I used the table saw to incorporate a 1/4" groove in the back so that the glass would lay flat/flush in the back of the wood frame. 


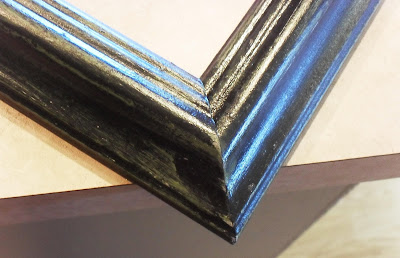
I stained the frames using Dark Walnut Danish Oil.  When dry, I applied two coats of "Ice Blue" by DecoArt.  The color was just a bit too light, so I repainted them with my new favorite paint color that I had mixed to match my fabric used for the patio furniture pillows. 


Once that coat dried, I lightly sanded each frame with 220-grit sandpaper revealing the lighter shade of Ice Blue.  I also sanded a little heavier around the inside and outside edges to reveal the dark stain.


Once everything was dry, I inserted the glass panels and secured them to the frame.  Using the same "great" blue paint, I painted the diamond in the middle of each glass panel...two coats on the front and two coats on the back.


I secured screw eyes to the top of each frame and then attached gold chain to the screw eyes.  I used gold chain to bring out the gold leading in the window panels.  I secured the window frames to my fence with more screw eyes.  I think the windows help "dress up" this old, weathered privacy fence.  It's a grey and gloomy day, so the colors aren't as vibrant as they should be, but I hope you can get an idea.


Here is a picture of all the the furniture pieces together.  I had alot of fun building everything...thanks to the great plans from Ana White


I still have a few more projects to go and will share them with you as I complete them.  Thank you for stopping by and taking a look.  I enjoy your visits and your great comments!  Have a great weekend!!

Lesa

Wednesday, June 29, 2011

Outdoor Bench and Storage

I have to apologize...my next few posts will are going to be about my deck.  I've been trying to "pretty it up" so I'll be sharing my finished projects with you.  Here are a couple of my latest...first of all, I built this outdoor bench to go with my chairs and made some matching cushions.


Next, is storage for the furniture pillows.  My husband built this box out of plywood and it's actual use was supposed to be for kindling for the fireplace. 


However, I kinda scooped it up and decided it would be perfect for pillow storage.  My husband had already painted it grey, but I needed to freshen it up a bit.  I used my new favorite color, which does not have a name because my local Home Hardware did a color match from my fabric swatch to mix the perfect paint color for me.  Anyway, I LOVE the color so you may see, in the future, that I may use this color quite a bit!   Back to the box...I gave it only one coat of paint.  I then made a stencil with the word "Storage".


 I stenciled it on to the lid used the color Sandbar.  Once dry, I gave just the lid and letters a light sanding, allowing a bit of the grey to show through. 


It certainly looks better than it did and now my pillows have a safe, dry place to be stored. 


Just a note...with the way our summer has been going, those pillows will be spending most of their time in storage!

Thank you for stopping by and I hope you have a great day!
Lesa

Thursday, June 23, 2011

Bellissimi Fiori

Here's a little something I'd like to share with you...I bought it at a garage sale for .50 cents.  A big, heavy, rusty hook.  My husband just chuckled when he saw my treasure.


I figured I couldn't loose spending a whole .50 cents and thought I'd find a use for it.  Well, here's what I came up with...


I found this in my husband's metal scrap pile, he removed the "hooky things", straightened the rods and just evened things up.


Now it looks like this...


I attached the hook to the metal mesh using rusty stove pipe wire.  I then found a scrap piece of wood, drilled two holes at the top and then stained it with dark walnut Danish Oil. 


Once dry, I used a chip brush to apply the Sandbar paint to the surface, using a dry brush method.  I then gave it a bit of a sanding to make it look even more like weathered wood.

I then painted on the words "Bellissimi Fiori" (beautiful flowers) using Antique Rose by Decoart and, again, sanded some of the lettering to remove the paint.  I attached the sign to the mesh using more rusty wire and then hung the finished "rusty junk" on my shed. 


I thought a small hanging basket with flowers would look nice suspended from the hook, but I don't have any hanging baskets so I used this wreath just for pictures.  What do you think?


This is part of "Would You Buy It" Wednesdays at Junker Newbie so...would you have bought the hook?

Thanks for stopping by...your comments are as welcomed, good or bad!  Have a great day.

Lesa

Wednesday, June 22, 2011

Deck Chairs Done!

Last week I gave you a peek at the chairs I was building for my deck.  I finally finished staining the last chair.  Just a note...I should have listened to my husband and stained the boards BEFORE I built the chairs...it would have been much easier!  It was very difficult and a bit frustrating trying to get in between the boards with a paint brush.  Oh well, they are done! 


I still have alot to do to "transform" my deck, so this is only the beginning.  Next up, I'll be building the matching tables to the chairs, painting an outdoor rug using vinyl floor covering and making some art to hang on the wall.  Also, outdoor lighting and lanterns are on my list, so I hope you will stay tuned and check out my progress. 


I would also like you to know that this outdoor furniture pattern came from Ana White.  Her furniture patterns are great and she designs for all skill levels.  If you haven't checked out her blog make she you do...you won't be disappointed.

Thank you for stopping by...I hope you enjoyed your visit.  And, thank you to all of you who have left such great comments!  I love your feedback.  Have a great day!

Lesa

Thursday, June 16, 2011

Bird Cage

It's another week of "Would You Buy It" at Junker Newbie, so here is my item for this week's party.


I found the bird cages at a garage sale for $1.00 each.  I wasn't crazy about the gold, but thought with a coat or two of spray paint they could be quite cute.  So, I bought them, brought them home, gave them a coat of primer and then two coats of Krylon's Oil Rubbed Bronze.  However, now that I've painted them, I'm not to crazy about the new color either!  Too dark.  What do you think?  What about an off white?


Anyway, I'm thinking I might use them outside on the patio and put a potted flower in the large cage and a grouping of candles in the smaller one.  Any other suggestions would be welcomed!  Oh, and I can't forget...would you have bought them?

Thank you for stopping by!

Lesa

Tuesday, June 14, 2011

Just A Peek!

I just wanted to give you a quick peek at the projects I've been up too.  First of all, I've been working on a project in here...


but I'm not quite done because I got side-tracked on the weekend and built four of these...


All four chairs are finished, but I still need to stain or paint them (haven't decided) and make cushions for them.  Also, I'm in the process of building a coffee table to go with the chairs. 
So...I'm going to keep "plugging along" and then I'll share the finished projects with you.  I hope you'll check back.  Have a great day and thanks for stopping by!

Lesa

Wednesday, June 8, 2011

Funky Junk

I'm loving the "Would You Buy It" blog party at Junker Newbie.  If you haven't checked it out, stop by, it's alot fun to see what everyone is buying and to also find out what everyone thinks of your purchase.  So, here's my latest junk purchase...when I saw it, I knew I had to have it.


Would you buy it?  Can you guess what it is?  And, any guesses as to what I am using it for?  The transformation was simple...I gave it a good cleaning with hot soapy water, making sure not to scrub any of the patina off,  and then I simply added a candle.  I love it, but would really love to hear what you think!


Oh yeah...it's a "jack"!  Thank you for stopping by and have a great day!
Lesa

Tuesday, June 7, 2011

Memo Board

I know, this isn't anything that you haven't seen before, but I wanted to share it with you anyway!  I love the look of the chicken wire memo boards, so I just had to make one. 

I had an empty picture frame so I decided to give it a coat of Light Avocado (DecoArt) paint.  When it dried, I rubbed a bit of candle wax over the entire frame and then gave it a coat of Lamp Black paint.  This doesn't have to cover completely because you're just going to sand it off to reveal the bottom color.  And, that was the next step...once the black paint dried, I used 150 grit sandpaper to reveal the green.  After removing the sanding dust, I gave it a coat of satin varnish. 


While the varnish dried, I cut my chicken wire to the inside measurement of my frame...I then gave the chicken wire a coat of black paint.  Of course, I didn't have any black spray paint so I painted it by hand using the same paint as the frame. 

Cut a piece of cardboard, foamcore or mat board (I used mat board) to the inside measurement of the frame and then adhere scrapbook paper using modge podge.  This will be your background color.  I used a green to match the green in the frame. 


Place the chicken wire in the frame and then lay the matboard on top of the chicken wire.  Secure in place.

Now for the clothespins...I mixed some black paint and water in a jar and then threw the clothespins into the jar to soak up the watery mix.  It almost acts like a stain...then just clip them to the edge of the jar to dry.  Lightly sand to remove the rough edges, as water and/or paint will raise the grain in wood.  To give them a bit more interest, I decided to attach these cute tokens I found at Michael's.  (Hence, my color scheme) 


I removed the little eye hook at the top of each token using wire cutters and then I attached them to my clothespins using hot glue. 


That's it...this is my little version of the Chicken Wire Memo Board.  I hope you like it!


These are my kids, Brendan and Taryn
Thank you for stopping by... have a great day!
Lesa