It might not be "her thing", but I had fun making it!
I started with well-weathered lumber. I cut 4 pieces 12" long. I then cut one of the pieces in half . These two pieces will sit at the bottom of the boards, one on the front and one on the back, as the base.
I glued all the boards together, then further secured them using an air nailer. Once together I sanded the boards.
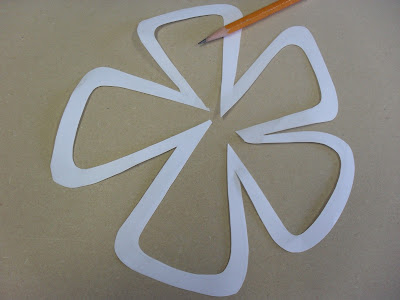
I made a flower pattern on paper, cut it out and traced it onto 1/4" thick mdf board. I used my scrollsaw to cut the flower.
I then found a font on the computer which would be easy to cut out of wood. Again, made a paper pattern, traced the letters onto 1/4" mdf and cut the letters using my scrollsaw. Once I had all the pieces cut, I sanded them using 100 grit and then 220 grit sandpaper.
The flower center...my initial idea was to use a wood button...didn't have anything big enough. So, I scrounged through all of my husband's scrap metal, bolts, screws, washers, etc. This is what I found that I thought would work as a flower center. Kinda rustic...
I placed everything on the plaque and drilled a hole (for the bolt to fit through) where the flower center would be...
I stained everything with dark walnut by Minwax. Once dry, I painted the flower with "sandbar" and the letters with "blue mist" by Decoart. Once dry, I lightly sanded the edges to allow the stain to be revealed, giving the pieces an aged look.
I secured everything with wood glue and inserted the flower center (the bolt) through the hole and secured it with a "nut" on the back.
Taryn
Thank you for stopping by...
Lesa


Too cute & you are oh so handy! Thanx for sharing. Tiffany
ReplyDeleteWow, that is so cute! I am sure she'll love it! Thanks for sharing this at Rustic Restorations Weekend!
ReplyDeleteI like your creativity. Very cute. Love the center of flower.
ReplyDeleteI stopped by from Funky Junk's SNS party. This is super cute. Love the center of the flower too!
ReplyDeleteLesa, it looks great! Pinned it :)
ReplyDelete<3 Christina @ I Gotta Create!
Wildly Original link party is open.
Very cool. So creative. I am hosting a link party and would love it if you would link up. Thanks.
ReplyDeletehttp://www.ifitsnotbaroquedesignblog.blogspot.com
Way cute!
ReplyDeleteSo cute! I would love for you to share this or any of your great ideas at the link party going on now (and every Saturday through Tuesday) at 'Or so she says ...' Hope to see you there! www.oneshetwoshe.com
ReplyDeleteThis is really cute. Great tutorial.
ReplyDeleteWe would also like to invite you to link up with us at our link party which goes live tonight: http://thebusybhive.blogspot.com/
Thanks!
The Busy Bee's,
Myrna and Joye.
Love it. I'll have to make one.
ReplyDeleteVery Informative! This blog is great source of information which is very useful for me. Thank you very much for sharing this!
ReplyDeleteTree of Life
韓國主播裸聊視頻fc2成人色情視頻色聊吧蜜桃色小說色色色情性交電影網be2交友
ReplyDeleteflasH成人色情視頻網魯大媽成人色情視頻成人色情視頻WWE怎麼下載毛片hi5交友
真人視頻視訊交友聊天室免費同城約炮網裸聊QQ視頻截圖午夜網址你懂的080聊天交友網
不用下載的裸聊視頻聊天室美女熱舞視頻七彩秀吧多人視頻聊天愛情電影網倫理網路交友
同城聊天室視頻聊美女成人熱舞視頻成人熱舞視頻毛片3P下載天天色綜合影院交友戀愛小站
午夜聊天室裸體視頻聊天網裸體視頻聊天哪個好香港電影三級毛片ecf香港交友網
9158美女視頻聊天裸聊視頻種子成人情色裸聊網站亞洲最大成人色情網站tt 同志交友網站
裸舞選秀女人赤身裸體視頻赤身裸體視頻午夜秀場在線直播做愛姿勢中國性健康網交友網站
美女裸體視頻網址真人秀聊天視頻網站七彩秀吧聊天室在線看片毛網站毛片神器拓網交友
中國裸體視頻網址裸體美女視頻高清播放9158多人視頻色情三級小說網免費交友聊天網